Introduction to Galaxy Analyses
How to get started in Galaxy. Here we'll cover the core tasks in Galaxy: uploading files, using tools, viewing histories, and running workflows.
Create a new History and name it
- Go to the History panel (on the right)
- Click on (Create new history) at the top of the history panel.
- Click on (Edit) next to the history name (which by default is “Unnamed history”)
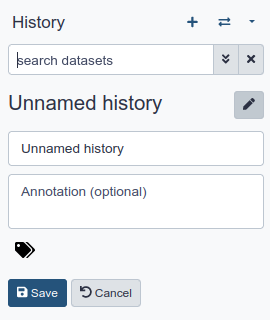
- Type in a new name, for example, “My first analysis”
- Click on Save
Go Up
Upload a file
- At the top of the Tools panel (on the left), click Upload
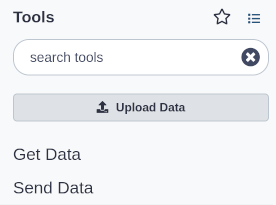 This brings up a box:
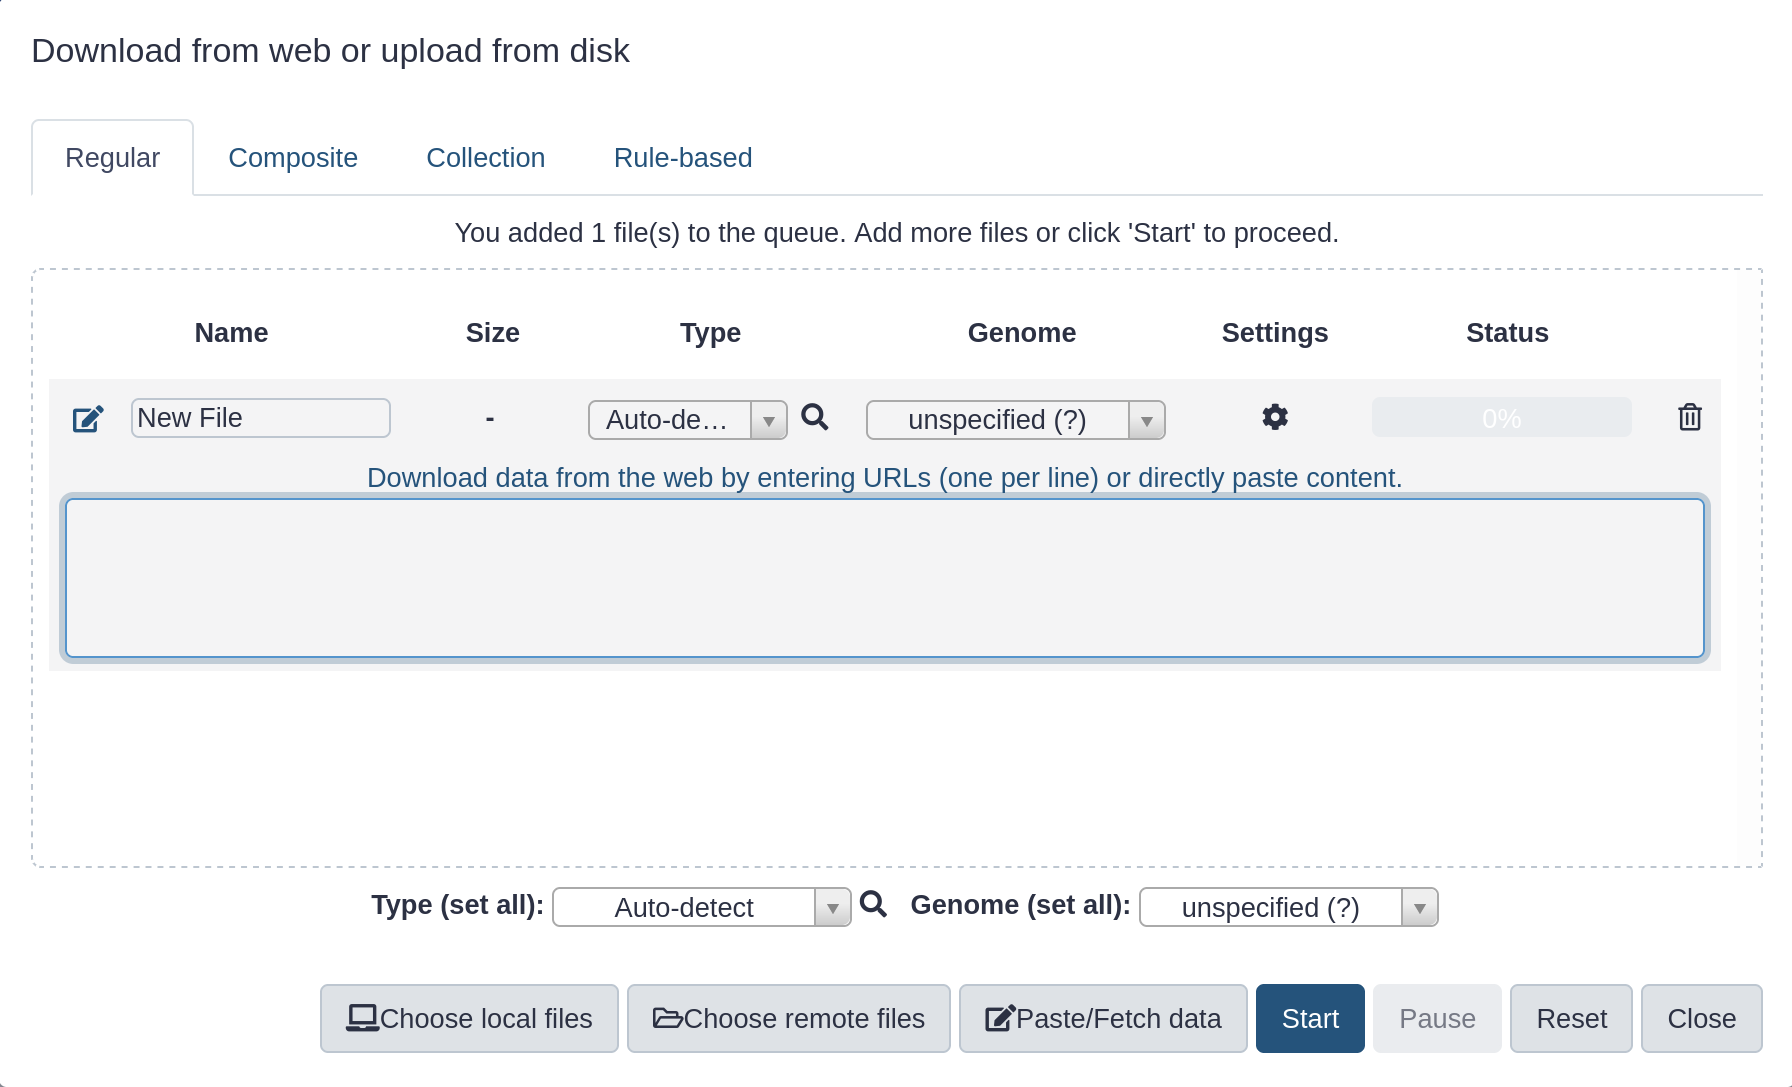
- Click Paste/Fetch data
- Paste in the address of a file:
https://zenodo.org/record/582600/files/mutant_R1.fastq
- Click start
- Click Close
After this you will see your first history item (called a “dataset”) in Galaxy’s right panel.
It will go through the gray (preparing/queued) and yellow (running) states to become green (success).
Go Up
View the dataset content
- Click on the (View Data) icon next to the dataset name, to look at the file conteny
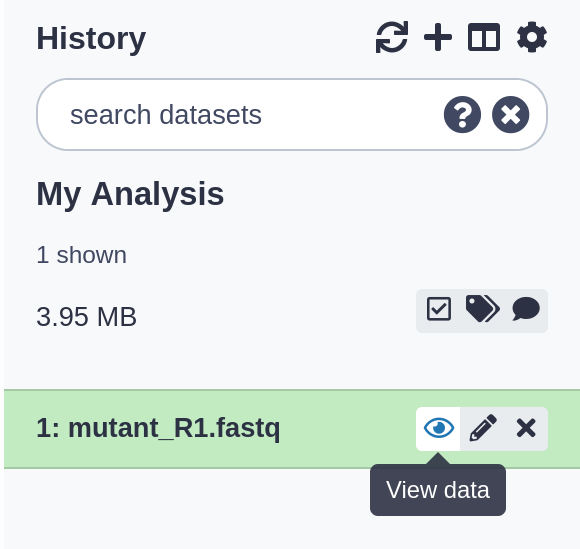
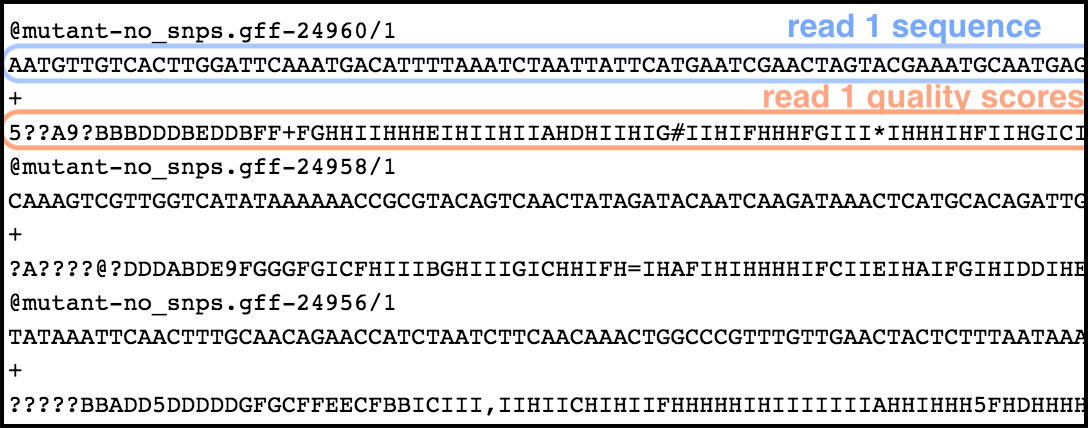
The contents of the file will be displayed in the central Galaxy panel.
This file contains DNA sequencing reads from a bacteria, in FASTQ format:
Go Up
Let’s look at the quality of the reads in this file.
- Type
FastQC in the tools panel search box (top)
- Click on the
FastQC tool
The tool will be displayed in the central Galaxy panel.
- Select the following parameters:
- param-file “Raw read data from your current history”: the FASTQ dataset that we uploaded
- No change in the other parameters
- Click Execute
This tool will run and two new output datasets will appear at the top of your history panel.
Go Up
View results
We will now look at the output dataset called FastQC on data 1: Webpage.
-
Once it’s green, click on the (View Data) icon next to the “Webpage” output dataset.
The information is displayed in the central panel
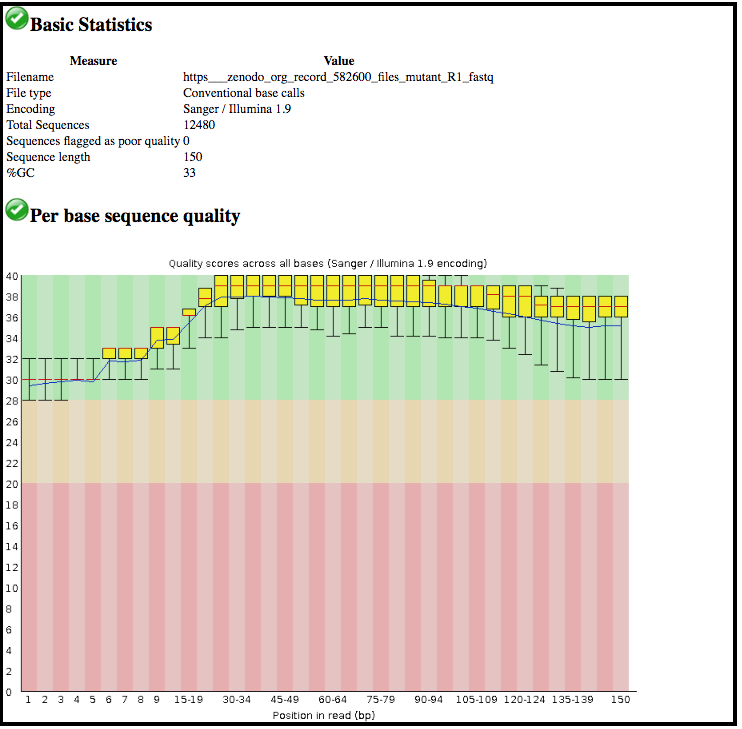
This tool has summarised information about all of the reads in our FASTQ file.
Question
- What was the length of the reads in the input FASTQ file?
- Do these reads have higher quality scores in the centre or at the ends?
Go Up
Let’s run a tool to filter out lower-quality reads from our FASTQ file.
- Type
Filter by quality in the tools panel search box (top)
- Click on the tool
Filter by quality
- Set the following parameters:
- param-file “Input FASTQ file”: our initial FASTQ dataset
- “Quality cut-off value”: 35
- “Percent of bases in sequence that must have quality equal to / higher than cut-off value”: 80
- Click Execute
After the tool has run, its output dataset will appear at the top of your History panel.
We could click on the eye icon to view the contents of this output file,
but it will not be very informative - we will just see a list of reads.
Go Up
- Click on the output dataset name in the History panel.
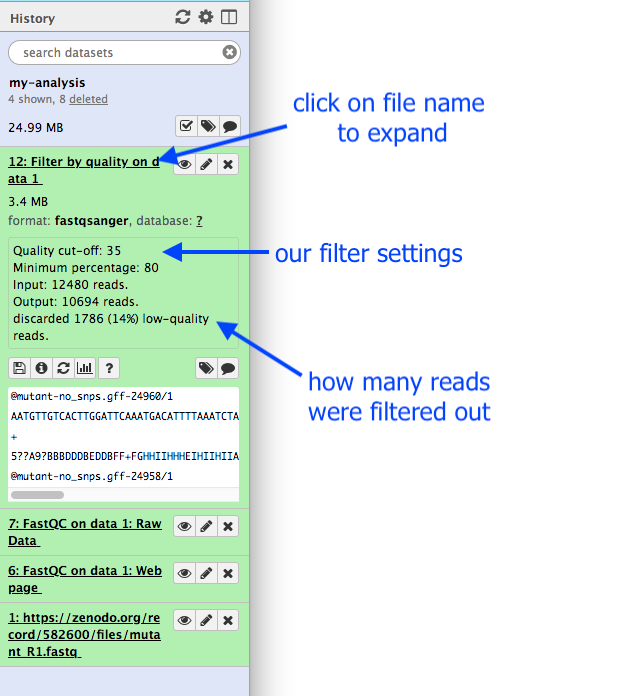
This expands the information about the file.
Question
- How many read has been discarded?
Go Up
We can now try to filter our input reads to an even higher standard, and see how this changes the resulting output (an exploratory analysis).
We will change the filter settings and re-run the tool.
- Click on the icon (Run this job again) for the output dataset of
Filter by quality
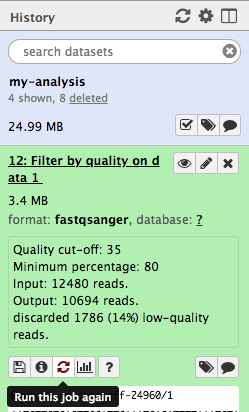 This brings up the tool interface in the central panel with the parameters set to the values used previously to generate this dataset.
- Change the settings to something even stricter
For example, you might decide you want 80 percent of bases to have a quality of 36 or higher, instead of 35.
- Click Execute
- View the results: Click on the output dataset name to expand the information
Question
- How many reads were discarded under these new filtering conditions?
Go Up
Share your history
Sharing your history allows others to import and access the datasets, parameters, and steps of your history.
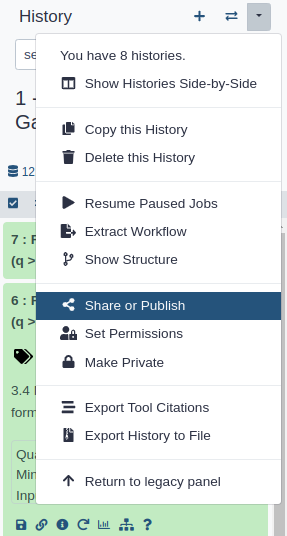
Click on (History options) at the top of your history panel and select Share or Publish
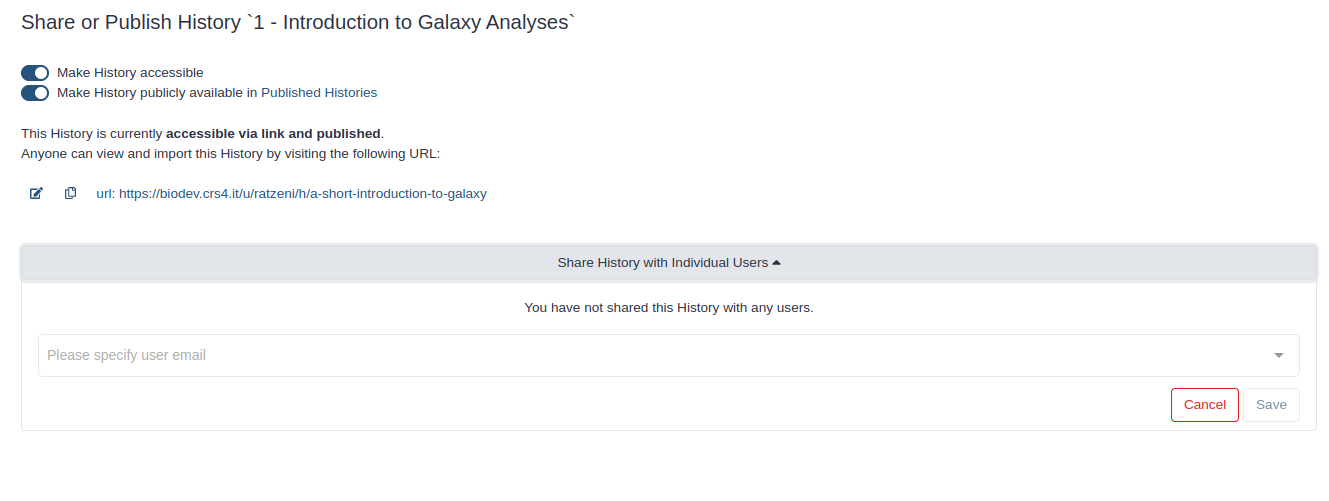
- Share via link
- Make History accessible
- A Share Link will appear that you give to others
- Publish your history
- Make History publicly available in Published Histories
- Anybody on this Galaxy server will see your history listed under the Shared Data menu
- Share only with another user
- Click the Share with a user button at the bottom
- Enter an email address for the user you want to share with
- Your history will be shared only with this user.
- Finding histories others have shared with me
- Click on User menu on the top bar
- Select Histories shared with me
- Here you will see all the histories others have shared with you directly
Go Up
Convert your analysis history into a workflow
- Clean up your history: remove any failed (red) jobs from your history by clicking on the button.
This will make the creation of the workflow easier.
- Click on (History options) at the top of your history panel and select Extract Workflow
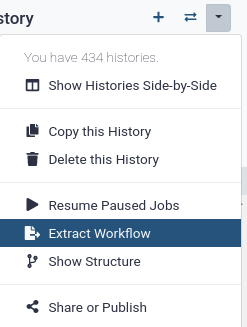 The central panel will show the content of the history in reverse order (oldest on top), and you will be able to choose which steps to include in the workflow.
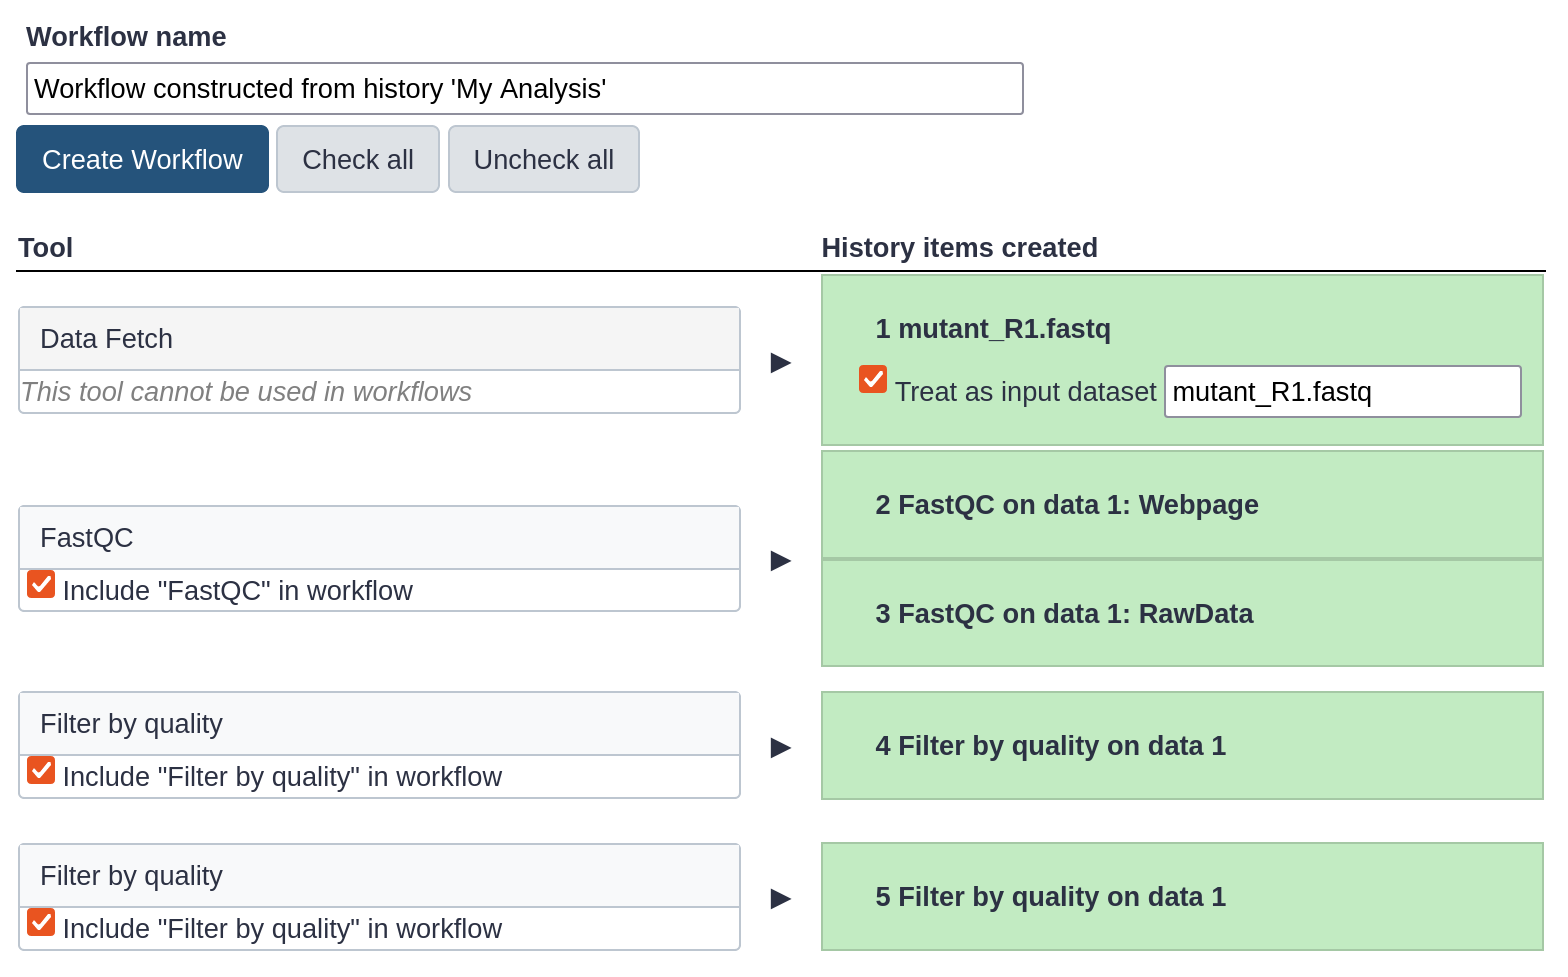
- Replace the Workflow name to something more descriptive, for example:
QC and filtering.
- Rename the workflow input in the box at the top of second column to:
FASTQ reads
- if there are any steps that shouldn’t be included in the workflow,
you can uncheck them in the first column of boxes.
In this case, uncheck the second
Filter by quality tool at the bottom, where we used a too high quality cut-off.
- Click on the Create Workflow button near the top.
Go Up
Look at all your histories
- Create a New History
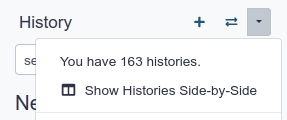
- Click on (History options) at the top of your history panel and select Show Histories side-by-side
- Copy a dataset into your new history (by dragging it)
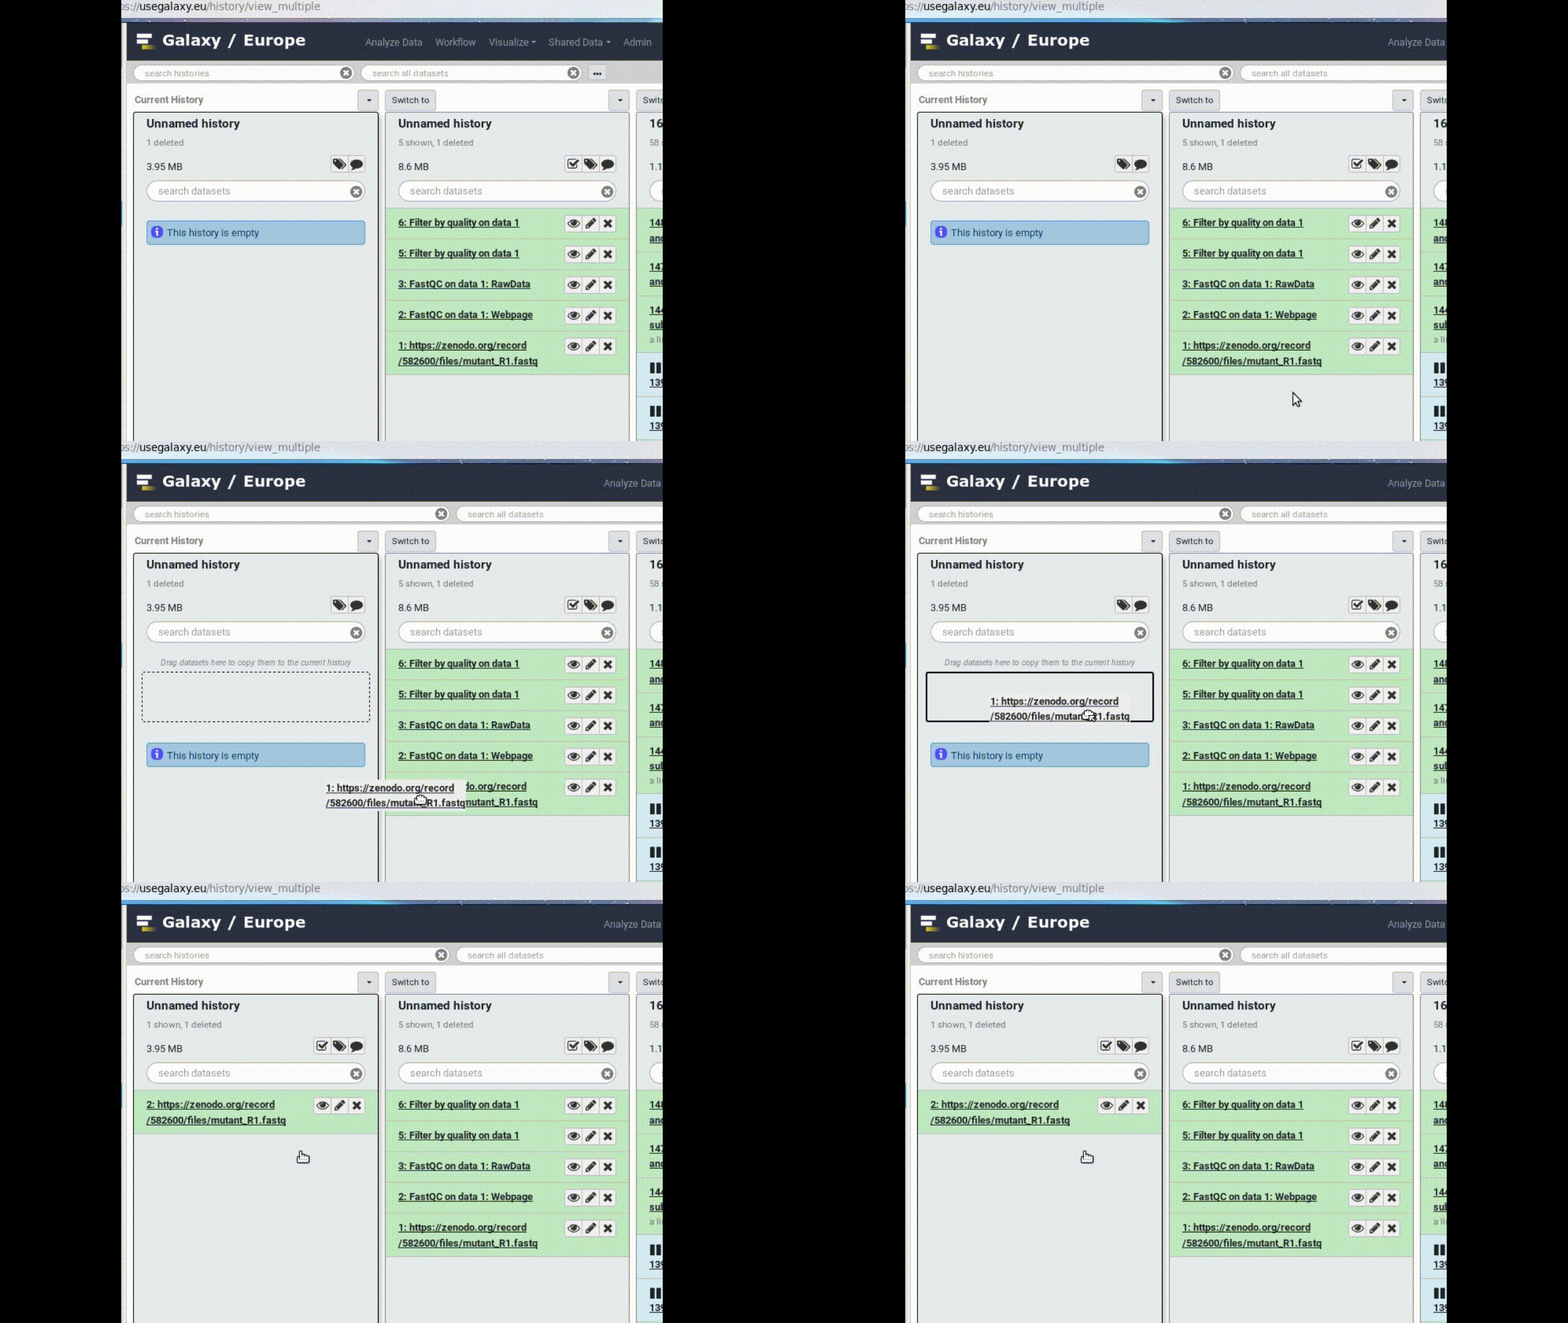
- Click on the (or Analyze Data on older versions of Galaxy) in the top panel to go back to your analysis window
Go Up
Run workflow in the new history
- Click on Workflow in the top menu bar of Galaxy.
Here you have a list of all your workflows. Your newly created workflow should be listed at the top:
 If you click on a workflow name, you can see all available actions for the workflow, e.g. edit, copy, rename, delete.
- Click on the (Run workflow) button next to your workflow.
The central panel will change to allow you to configure and launch the workflow.

- Check that the “FASTQ reads” input is set to the FASTQ dataset we have copied to the new history. In this page we could change any parameter for the tools composing the workflow as we would do when running them one by one.
- Run Workflow
You should see a message that the workflow was successfully invoked. Then jobs will start to run and datasets appear in your “Next Analysis” history, replicating the steps of your previous history.
Go Up

 This brings up a box:


 This brings up the tool interface in the central panel with the parameters set to the values used previously to generate this dataset.

 The central panel will show the content of the history in reverse order (oldest on top), and you will be able to choose which steps to include in the workflow.



 If you click on a workflow name, you can see all available actions for the workflow, e.g. edit, copy, rename, delete.